Watching an emergency where a stranger gives mouth-to-mouth CPR to the victim raises the importance of using a barrier device.
While some medical shows showcase the lifesaving power of CPR, these dramas often neglect to address the elephant in the room – how does a responder protect themselves from virus transmission while giving resuscitation.
Fortunately, barrier devices exist to keep responders safe during mouth-to-mouth resuscitation.
What Is A Barrier Device?
A barrier device is a type of personal protective equipment mostly used by medical and non-medical professionals when providing CPR. It is designed to protect responders from potential exposure to germs and infectious diseases during resuscitation.
The device works by effectively limiting the transmission of fluids, creating a barrier between the rescuer and the patient.
It consists of a one-way breathing valve that allows to deliver air to the victim while simultaneously protecting the responder from the air and other bodily fluids coming back up through the tube.
There are two types of CPR barrier devices accessible to the general public:
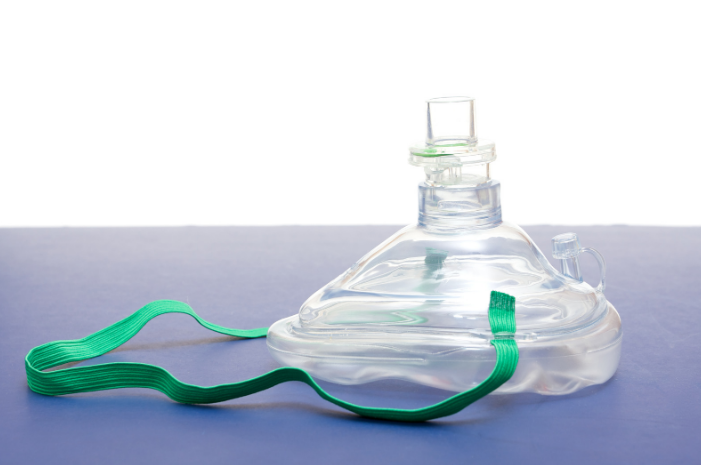
Face Mask
A face mask is a moulded plastic that fits over the person’s face and has a longer one-way valve. When used correctly, it can create a tight seal during resuscitation using an inflated bladder that sits on the victim’s face.
The strap that goes over the rescuer’s face will ensure the mask stays in place. Upon blowing air to the one-way valve, it will fill the sealed mask with oxygen that goes directly to the patient.
Face Shield
A face shield is made of a tough plastic sheet that is water-tight and has a built-in masterpiece that works as a one-way valve. The barrier is simply laid on top of the victim’s face during CPR, covering both mouth and nose.
One end of the mouthpiece is inserted in the victim’s mouth while the responder blows air through the other end.
Ensure that the flat plastic stays between responder and victim to avoid transmission.
What If The Responder Is Still Uncomfortable Giving CPR, Even With A Barrier Device?
As the COVID-19 pandemic continues to cause health issues worldwide, people still have concerns about virus transmission.
Safety is important now more than ever, and the last thing we want is to let discomfort stand in the way for us to save lives. The good news is that there is another effective method of CPR, such as Hands-only CPR.
Step-By-Step Guide On Administering CPR
Administering CPR on a victim who is not breathing, is non-responsive, and maybe suffering from cardiac arrest can significantly increase the chance of survival.
While CPR may seem confusing or overwhelming for others, it is actually fairly easy to learn.
First and foremost, before starting any medical care, it is important to call triple zero (000) and check the environment. If it is not safe to approach the scene, it is best to wait for emergency services.
Stay clear of any hazards and tell the dispatcher the vital details of the situation. Once it is safe to approach the scene, follow these fundamental CPR steps while waiting for EMS to arrive.
Step 1
Place the heel of the dominant hand at the centre of the person’s chest. Ensure the victim is lying on a hard, flat surface such as a floor.
Step 2
Put the other hand over the dominant hand, interlocking the fingers. Only use one hand when providing Child CPR (eight years or below). For infants (newborn to 12 months), only use two fingers.
Step 3
Lean directly over the victim, keep the arms straight and start giving chest compressions. Press down into the chest and wait for it to rise fully.
Push down about two inches (or five centimetres) and aims to do 100 compressions per minute, following the beat of the famous Bee Gee’s song “Staying Alive.”
Step 4
Once 30 compressions are done, proceed with giving rescue breaths. Open the person’s mouth and slightly tilt the head backwards.
Cover the face with a preferred barrier device and start giving rescue breaths.
Step 5
Continue breathing into the victim’s mouth, just enough to see their chest rise. If it does not raise the chest, reposition the head and try again.
Add a rescue breath. Breathe into the person’s mouth, enough for their chest to begin to rise. If you can’t see the chest starting to rise, reposition their head and try again.
Step 6
Continue performing the cycle of 30 compressions, two breaths cycle until EMS arrives or until the person regains consciousness.
When feeling tired, ask another trained bystander to switch while regaining strength.
Get CPR Training
While CPR can seem complex, administering it is much simpler and straightforward than most would think. It all comes down to knowing and understanding the six fundamental steps of CPR.
Interested in getting a CPR training course? Check out our upcoming courses or call us at (08) 7120 2570 to know more.